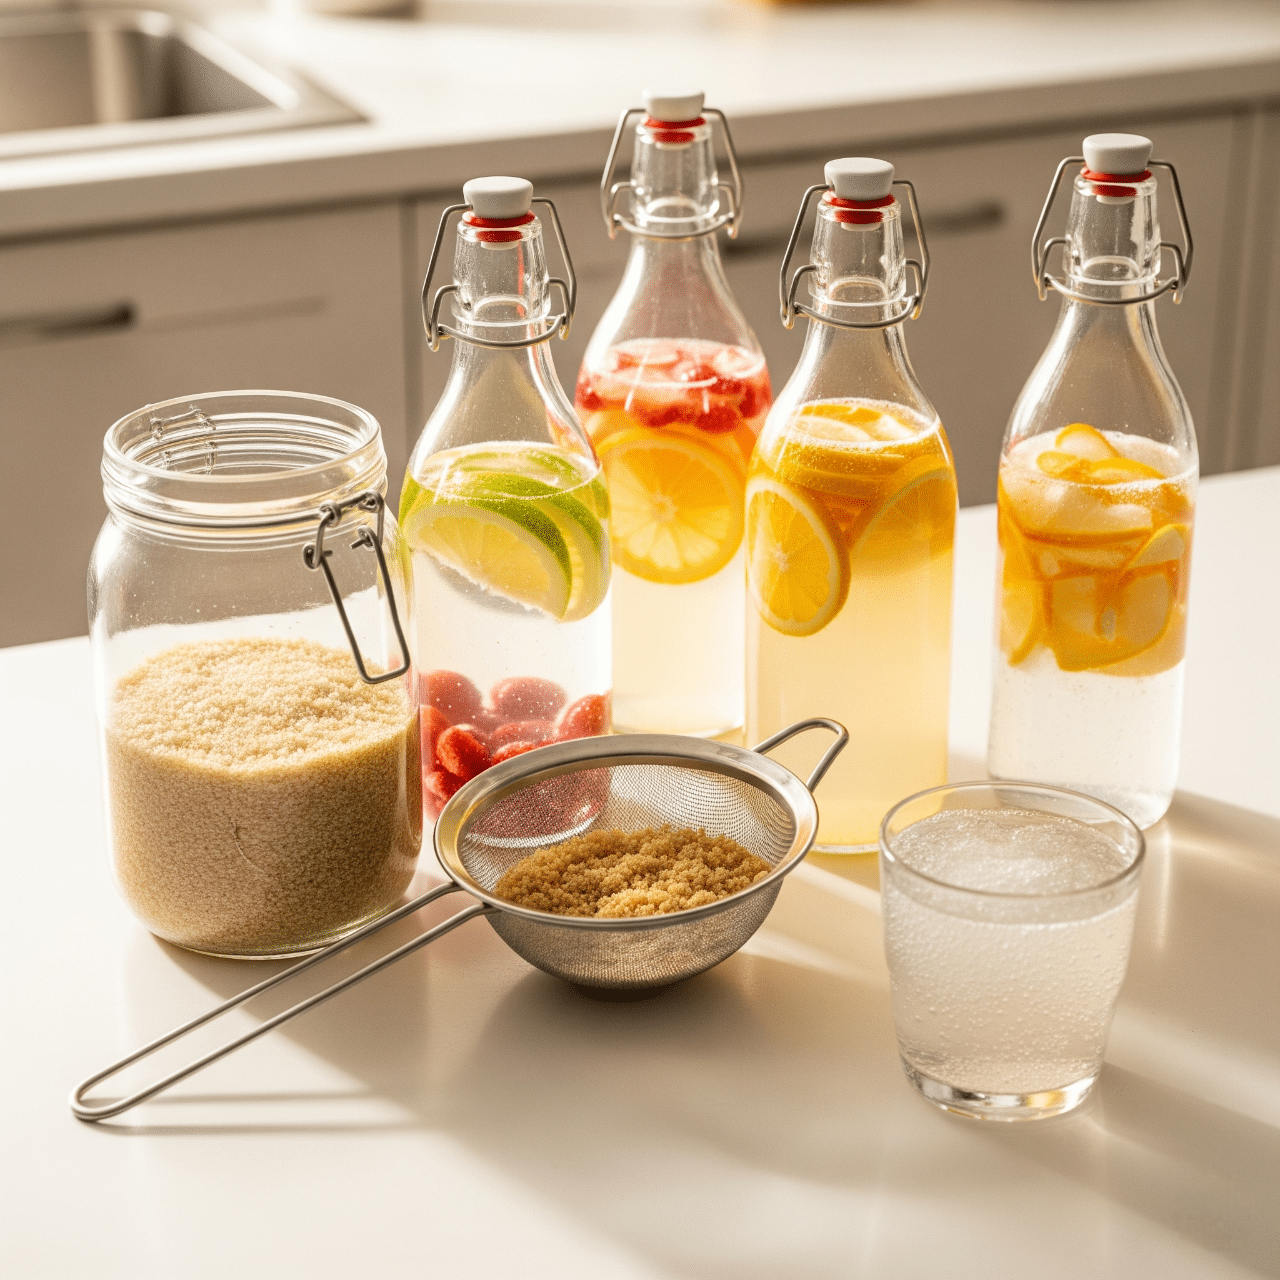
Ever felt curious about gut health and those amazing fermented foods, but thought making them at home seemed a bit too complicated? Maybe you’ve seen fancy kombucha bottles or heard about traditional kefir, and wondered if there was an easier way to get those gut-friendly benefits? Get ready for a game-changing solution that’s both simple and delicious: How to Make Beginner-Friendly Water Kefir (Step-by-Step Guide)!
This isn’t just any ordinary fizzy drink. A truly amazing Beginner-Friendly Water Kefir is a powerful, naturally sparkling, and incredibly easy-to-make probiotic drink. It’s packed with good bacteria that support a happy gut, and it’s a fantastic alternative to sugary sodas. You might think fermentation is tough, but I promise making your own Water Kefir is surprisingly effortless!
If you’re eager to discover how to craft this ultimate and wonderfully fizzy Beginner-Friendly Water Kefir, you’ve absolutely landed in the perfect spot. This step-by-step guide will walk you through every simple part, helping you transform basic sugar water into a gut-loving powerhouse. Get ready to sip your way to better digestion, more hydration, and a healthier you – it’s a breakthrough for homemade wellness!
How to Make Beginner-Friendly Water Kefir (Step-by-Step Guide)
Equipment
- 1 Glass Jar Quart or half-gallon size
- 1 Non-Metal Lid Breathable cloth cover with rubber band, or plastic lid
- 1 Non-Metal Strainer Plastic or fine mesh stainless steel
- 1 Non-Metal Spoon Plastic or stainless steel
- Several Airtight Bottles For second fermentation, like swing-top bottles
Ingredients
- 1/4 cup active water kefir grains
- 1/4 cup unrefined sugar organic cane sugar or turbinado sugar is best
- 4 cups filtered water non-chlorinated is essential!
- Optional additions for flavoring for F2:
- 1/4 cup fruit juice like apple, grape, or cherry
- A few slices of fresh fruit lemon, ginger, berries
- 1 teaspoon dried fruit like raisins or figs, avoid sulfured
Instructions
- Step 1: Prepare Your Water & Sugar for Water Kefir – In your clean glass jar, add 1/2 cup warm filtered water and 1/4 cup unrefined sugar. Stir until sugar is completely dissolved. Add remaining cold filtered water. Ensure sugar water is completely cooled to room temperature before proceeding.
- Step 2: Add Grains & Start First Fermentation (F1) – Once sugar water is cool, carefully add 1/4 cup active water kefir grains to the jar. Cover with a breathable non-metal lid (cloth and rubber band). Place at room temperature (around 68-75°F or 20-24°C) out of direct sunlight for 24-48 hours.
- Step 3: Strain & Remove Grains – After 24-48 hours (liquid less sweet/tangy), carefully place a non-metal strainer over a clean bowl. Pour entire jar contents through the strainer. The water kefir grains will be caught. Rinse grains gently with filtered water if slimy, then place into a fresh batch of sugar water (back to Step 1).
- Step 4: Flavor Your Water Kefir (Second Fermentation – F2) – Pour your strained water kefir liquid into clean, airtight bottles. Add your chosen flavorings (fruit juice, fruit pieces, dried fruit). Seal bottles tightly. Let ferment at room temperature for 12-48 hours. Crucially, "burp" bottles once or twice a day by briefly opening the cap to release gas.
- Step 5: Chill & Enjoy Your Fizzy Drink – Once Second Fermentation is complete (good fizz when burped), move your flavored water kefir bottles to the refrigerator. Chilling will slow down fermentation and enhance fizz. Enjoy your delicious, homemade Beginner-Friendly Water Kefir!
What is Water Kefir & Why It’s Your New Favorite Probiotic Drink?
You might have heard of milk kefir or kombucha, but get ready to meet another amazing fermented drink: Beginner-Friendly Water Kefir! This fizzy, probiotic powerhouse is quickly becoming a favorite for those looking for a simple way to boost their gut health.
Water Kefir 101: Understanding These Fizzy Probiotic Grains
So, what exactly is water kefir? It might sound a bit mysterious, but it’s really quite simple!
- Tiny Powerhouses: Water kefir is made using “water kefir grains.” Despite their name, these aren’t actually grains like wheat or rice. Instead, they are a symbiotic culture of bacteria and yeast (SCOBY). Think of them as tiny, translucent, jelly-like crystals, almost like small, clear pearls.
- Not Dairy! It’s super important to know that water kefir grains are completely different from milk kefir grains. Water kefir is dairy-free, making it a fantastic option for anyone avoiding dairy.
- The Magic Happens: These amazing little grains feed on sugar water. As they munch on the sugar, they create lactic acid, carbon dioxide, and other beneficial compounds. The result? A naturally fizzy, slightly tangy, and wonderfully probiotic drink that’s easy to make. This process is how you get your Beginner-Friendly Water Kefir!
The Gut-Friendly Benefits of Beginner-Friendly Water Kefir
Beyond its delicious fizz, Beginner-Friendly Water Kefir offers a powerful punch of health benefits, especially for your digestive system.
- Probiotic Power: This is the biggest benefit! Beginner-Friendly Water Kefir is packed with a diverse range of live, beneficial bacteria (probiotics) and yeasts. These good microbes help support a healthy gut microbiome, which is key for smooth digestion, strong immunity, and even your mood!
- Hydrating & Refreshing: It’s a fantastic way to stay hydrated! The natural fizziness and light tang make it much more exciting than plain water, especially on a warm day.
- Naturally Low Sugar: While you add sugar to start the process, the water kefir grains actually eat most of that sugar during fermentation. This leaves you with a naturally less sweet drink compared to store-bought sodas. It’s a smart choice for reducing added sugars in your diet.
- Amazing Soda Alternative: If you love fizzy drinks but want to cut down on artificial sweeteners or too much sugar, Beginner-Friendly Water Kefir is your ultimate go-to! It’s a delicious, healthier replacement for sugary sodas and other commercial fizzy drinks.
Essential Ingredients & Equipment for Your Water Kefir Journey
To make your Beginner-Friendly Water Kefir a roaring success, you don’t need a lot of fancy ingredients or equipment. In fact, you probably have most of what you need already! It’s all about choosing the right basics to keep your water kefir grains happy and bubbling.
Your Starter: Sourcing Quality Water Kefir Grains
This is the most important part of your Beginner-Friendly Water Kefir adventure: getting good quality water kefir grains! Think of them as the tiny “pets” that make all the magic happen.
- Importance: Good quality grains are crucial for successful and consistent Beginner-Friendly Water Kefir. Happy grains make happy fizz!
- Where to Buy:
- Online Suppliers: This is often the easiest way to find reliable, healthy water kefir grains. Look for reputable sellers who specialize in fermentation starters. A quick search for “live water kefir grains” will give you options.
- Health Food Stores: Some specialty health food stores or co-ops might carry them, usually in the refrigerated section.
- Local Fermentation Groups: Many passionate home fermenters love to share their extra grains! Check online community groups or local farmer’s markets.
- Active vs. Dehydrated:
- Active Grains: These are live, hydrated grains that can usually start fermenting right away after a quick rinse.
- Dehydrated Grains: These are dried for shipping and need to be “activated” or “rehydrated” first. This usually involves a few days of feeding them sugar water until they become active again. Follow the seller’s specific instructions for activating them.
Simple Sweeteners & Water for Best Fermentation
The right sugar and water are key to feeding your water kefir grains and creating delicious Beginner-Friendly Water Kefir.
- Sugar is Food (for the Grains!): This is a super important point! The sugar you add is not mostly for you. It’s the food that the water kefir grains eat to do their fermentation job. As they ferment, they gobble up much of the sugar, leaving a naturally less sweet drink.
- Best Sugar: Unrefined sugars like organic cane sugar or turbinado sugar are best. They contain extra minerals that the grains love, helping them thrive. Regular white granulated sugar can also work, but your grains might be a bit happier with the unrefined kind.
- No Artificial Sweeteners: Crucially, never use artificial sweeteners (like stevia, erythritol, aspartame, etc.). These provide no food for the grains, and your Beginner-Friendly Water Kefir won’t ferment properly.
- Filtered Water is Key: Your water quality matters a lot for happy grains.
- Use Filtered Water: Tap water often contains chlorine or chloramines, which can harm the delicate water kefir grains. Using filtered water (from a Brita filter, fridge filter, or bottled filtered water) is essential for a successful Beginner-Friendly Water Kefir.
Basic Equipment for Beginner-Friendly Water Kefir
You don’t need a science lab to make Beginner-Friendly Water Kefir! Just a few simple kitchen tools will do the trick.
- Glass Jar: A clean, wide-mouth glass jar is perfect. A quart (32 oz) or half-gallon (64 oz) size is ideal to start with. Glass is best because it doesn’t react with the fermenting liquid.
- Non-Metal Lid: Metal lids can sometimes react with the slightly acidic fermenting liquid, which isn’t good for your grains or your Beginner-Friendly Water Kefir. Instead, use:
- A breathable cloth cover secured with a rubber band (like a coffee filter or a thin dish towel). This allows air exchange.
- A plastic lid (like from a food container).
- A simple glass lid that rests loosely on top.
- Non-Metal Strainer/Spoon: Again, to avoid harming your delicate water kefir grains, always use plastic, nylon, or stainless steel (good quality stainless steel is generally fine for short contact, but plastic/nylon is safest).
- A non-metal fine-mesh strainer is perfect for separating your grains from the finished Beginner-Friendly Water Kefir.
- A non-metal spoon for stirring.
Step-by-Step Recipe: How to Make Beginner-Friendly Water Kefir (Foolproof Method)
Now for the magic! Making this Beginner-Friendly Water Kefir isn’t complicated at all. These simple steps will make sure you get the most benefits and wonderful fizz. Get ready to fill your kitchen with the most comforting and healthy smells – your Water Kefir is going to be amazing! This is your ultimate step-by-step guide to Beginner-Friendly Water Kefir.
Yields: About 4 cups (1 liter) per batch (easily scaled up!) Prep time: 10 minutes Fermentation (F1): 24-48 hours Flavoring (F2): 12-48 hours Total Time: 2-5 days (mostly waiting!)
Ingredients List for Your Beginner-Friendly Water Kefir
Here’s what you’ll need for one batch. Remember, choose quality ingredients for the best Beginner-Friendly Water Kefir!
- 1/4 cup active water kefir grains
- 1/4 cup unrefined sugar (organic cane sugar or turbinado sugar is best)
- 4 cups filtered water (non-chlorinated is essential!)
- Optional additions for flavoring (for F2, see Step 4):
- 1/4 cup fruit juice (like apple, grape, or cherry)
- A few slices of fresh fruit (lemon, ginger, berries)
- 1 teaspoon dried fruit (like raisins or figs, avoid sulfured)
Equipment Needed for Your Water Kefir
- 1 Glass Jar (quart or half-gallon size, clean)
- 1 Non-Metal Lid (breathable cloth cover with rubber band, or plastic lid)
- 1 Non-Metal Strainer (plastic or fine mesh stainless steel)
- 1 Non-Metal Spoon (plastic or stainless steel)
- Airtight Bottles (for second fermentation, like swing-top bottles)
Step 1: Prepare Your Water & Sugar for Water Kefir
First, let’s get your sugar water ready. In your clean glass jar, add about 1/2 cup of warm (not hot!) filtered water. Pour in the 1/4 cup of unrefined sugar. Stir it with your non-metal spoon until the sugar is completely dissolved. This creates the food for your water kefir grains.
Now, add the remaining 3 1/2 cups of cold filtered water to the jar. This will help cool down the warm water quickly. It’s super important that the sugar water is completely cooled to room temperature before you add your grains. If the water is too hot, it can harm your delicate water kefir grains and prevent your Beginner-Friendly Water Kefir from fermenting properly.
Step 2: Add Grains & Start First Fermentation (F1)
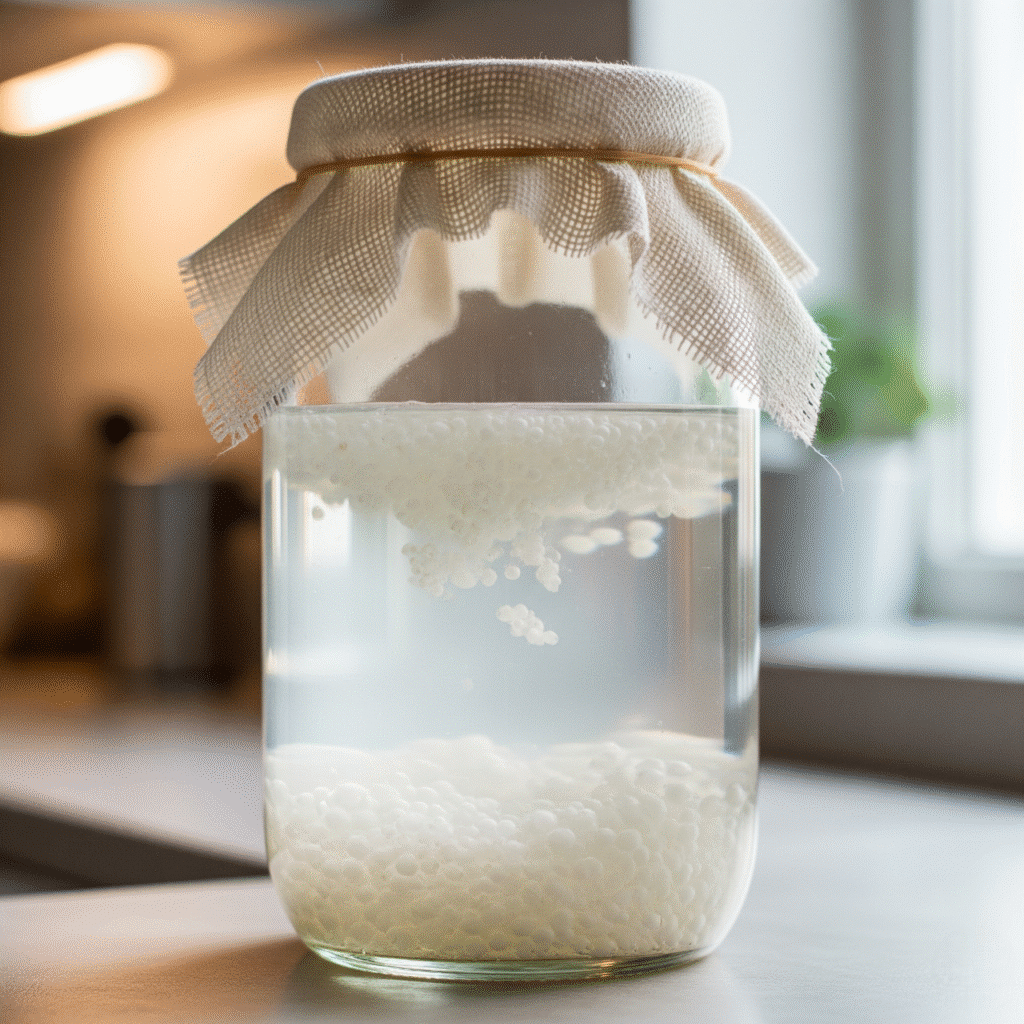
Once your sugar water is completely cool, it’s time to add your water kefir grains! Carefully add the 1/4 cup of active water kefir grains to the jar. Do NOT use a metal spoon here if possible – opt for plastic or stainless steel.
Cover the jar with your breathable non-metal lid (a cloth secured with a rubber band works perfectly!). This allows air to get in but keeps out dust and unwanted visitors. Place your jar in a spot that’s at room temperature (around 68-75°F or 20-24°C) and out of direct sunlight. This is your First Fermentation, often called F1. Let it ferment for 24-48 hours. The warmer your room, the faster it will ferment!
Step 3: Strain & Remove Grains
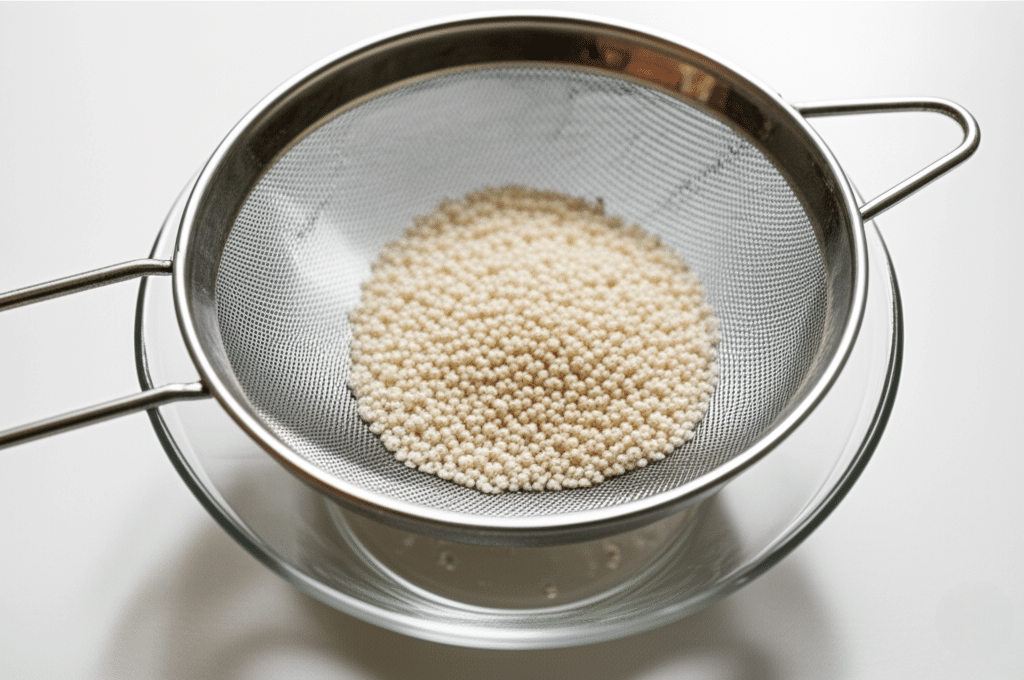
After 24-48 hours, your First Fermentation (F1) is ready! You’ll notice the liquid is less sweet and perhaps a little tangy. It might even have a slight fizz.
Carefully place your non-metal strainer over a clean bowl or another clean glass jar. Pour the entire contents of your fermentation jar through the strainer. The fermented liquid will collect in the bowl/jar, and your water kefir grains will be caught in the strainer. These grains are now ready for your next batch of Beginner-Friendly Water Kefir! Give the grains a quick rinse with fresh filtered water if they seem a bit slimy, then place them directly into a fresh batch of sugar water (starting again at Step 1).
Step 4: Flavor Your Water Kefir (Second Fermentation – F2)
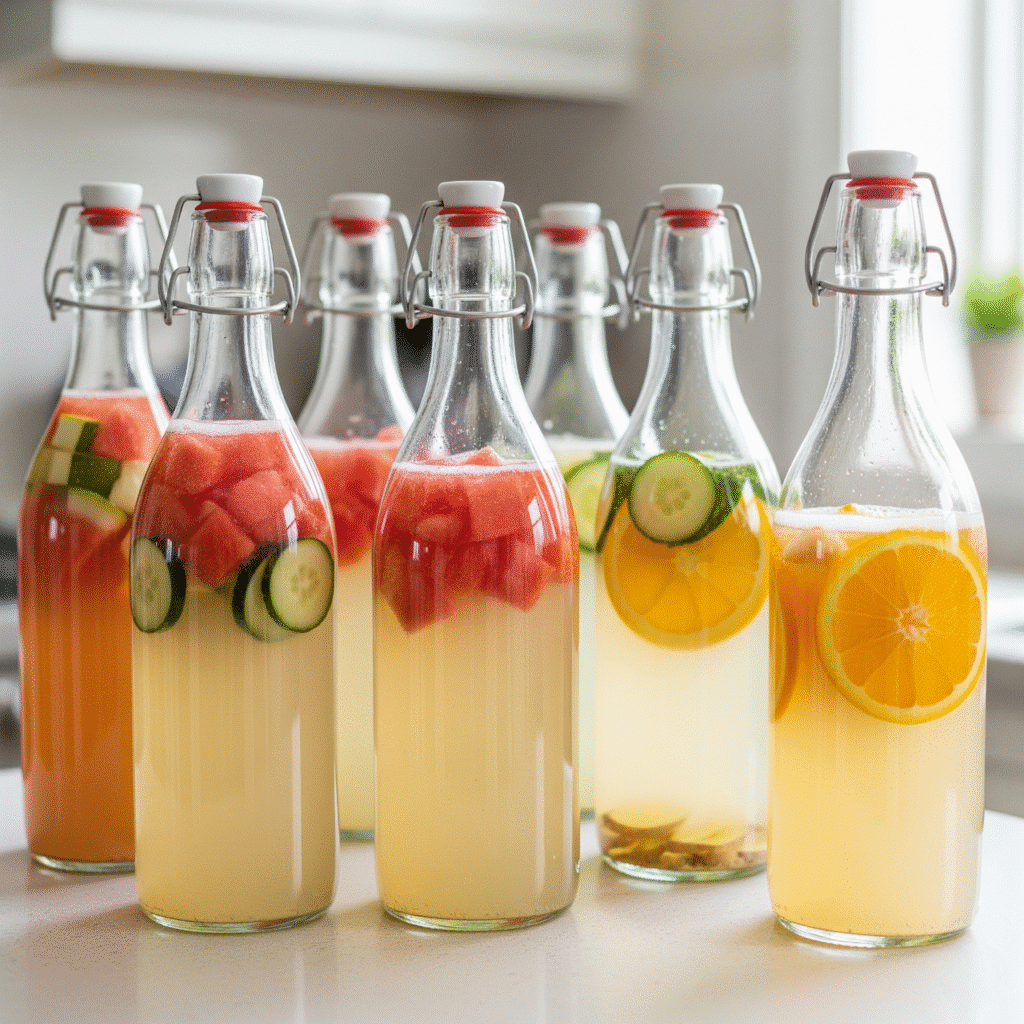
This is where the real fun – and fizz! – happens for your Beginner-Friendly Water Kefir! The liquid you just strained (your F1 water kefir) is now ready to be flavored. This is called the Second Fermentation, or F2.
- Add Flavor: Pour your strained water kefir into clean, airtight bottles. Add your chosen flavorings. Popular additions include 1/4 cup of fruit juice (like apple, grape, or cherry juice per 4 cups of liquid), a few slices of fresh fruit (lemon, ginger, berries), or 1 teaspoon of dried fruit (like raisins or figs).
- Seal & Ferment: Seal the bottles tightly with airtight caps (swing-top bottles work perfectly for fizz!). Let them ferment at room temperature for 12-48 hours.
- “Burping” is Essential! During F2, more fizz builds up. To prevent bottles from exploding (yes, it can happen!), you must “burp” them by briefly opening the cap once or twice a day to release the built-up gas. This is a crucial safety step for Beginner-Friendly Water Kefir!
Step 5: Chill & Enjoy Your Fizzy Drink
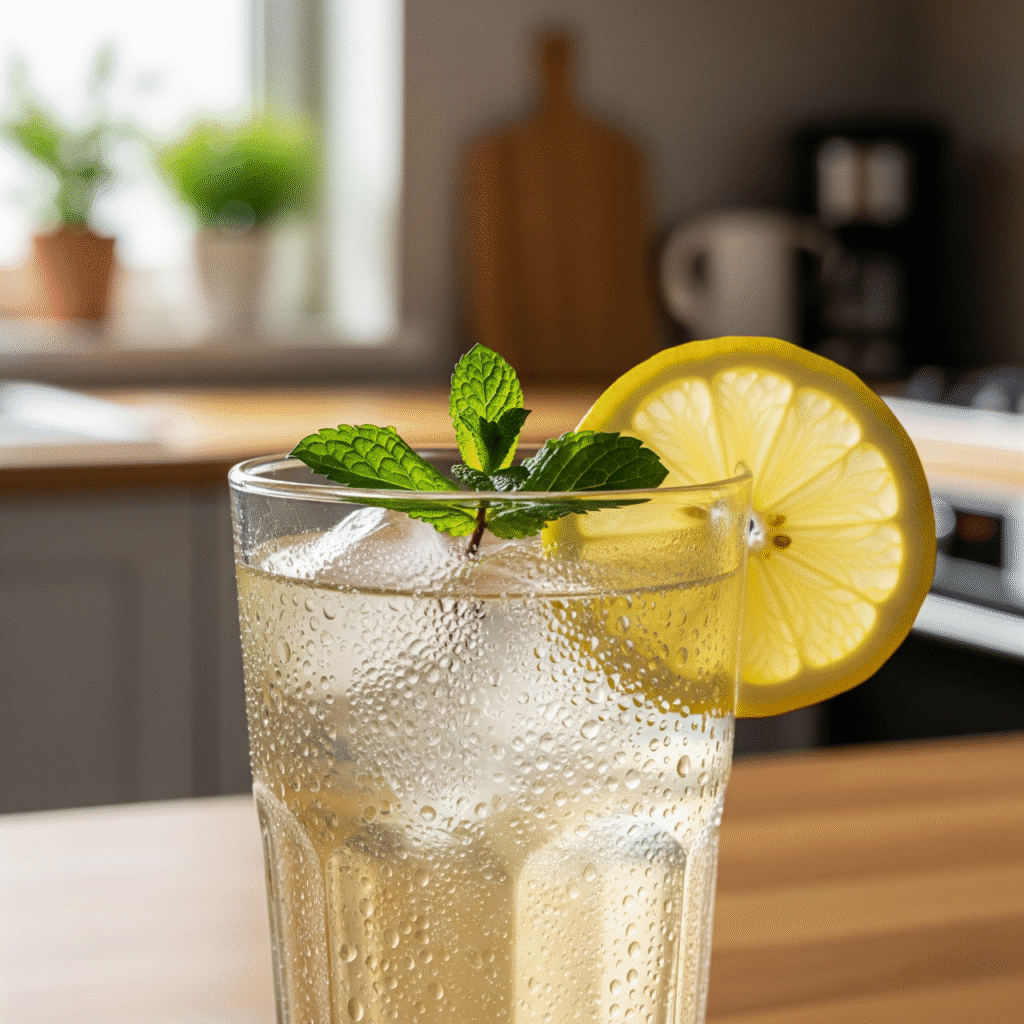
Once your Second Fermentation is complete (you’ll notice good fizz when you burp the bottles), move your flavored Water Kefir bottles to the refrigerator. Chilling will slow down the fermentation process and help the fizz dissolve into the liquid, making it even bubblier.
Enjoy your delicious, homemade, Beginner-Friendly Water Kefir as a refreshing and probiotic-rich drink!
How to Use Your Beginner-Friendly Water Kefir (Beyond Sipping!)
Congratulations! You’ve just made a batch of amazing Beginner-Friendly Water Kefir. While simply enjoying it on its own is wonderfully refreshing, this versatile drink is so much more than just a fizzy beverage! Putting your Water Kefir to work in your kitchen is an easy way to add probiotics and a delicious zing to many meals and drinks.
Here are some great ways to use your Beginner-Friendly Water Kefir:
Refreshing Daily Hydration
This is the simplest way to enjoy your Beginner-Friendly Water Kefir.
- It’s a fantastic alternative to plain water, especially if you find plain water a bit boring. The natural fizz and light tang make hydration much more exciting!
- Keep a pitcher in the fridge for a quick, healthy, and delicious drink anytime.
Natural Soda Alternative
If you love fizzy drinks but want to cut down on artificial sweeteners, excessive sugar, or processed ingredients, your Beginner-Friendly Water Kefir is your ultimate go-to!
- It provides that satisfying bubbly texture and a pleasant tang without the drawbacks of commercial sodas.
- Experiment with different flavors (from Step 4 of the recipe) to create your own custom “healthy soda” bar!
Base for Smoothies
Give your favorite smoothie recipes a powerful probiotic boost by swapping out some or all of the liquid for Beginner-Friendly Water Kefir!
- It adds a subtle tang and a delightful fizz that can elevate your usual smoothie.
- It’s an easy way to sneak in extra gut-friendly microbes. Just blend your fruits and veggies with your Water Kefir for a truly supercharged drink!
Homemade Fruit Sodas
This is where your creativity can really shine with Beginner-Friendly Water Kefir!
- Use your plain (F1) Water Kefir as the base for homemade fruit sodas.
- Simply combine it with fresh fruit juice, pureed fruit, or even a homemade fruit syrup for a vibrant, naturally fizzy drink that you control.
- This is a fantastic way to customize flavors and make healthy treats for the whole family.
Freezing Grains for a Break
While this isn’t a “recipe” for using Beginner-Friendly Water Kefir, it’s a crucial tip for any water kefir brewer.
- If you need a break from fermenting, you can store your water kefir grains in a small amount of sugar water in the freezer for longer periods (up to a few months).
- This acts as a “reset” or “storage” option, allowing you to take a vacation or simply step away from daily fermentation without losing your precious grains. Just remember they’ll need a few batches to “wake up” fully when you’re ready to restart your Beginner-Friendly Water Kefir production.
Troubleshooting & FAQs for Your Beginner-Friendly Water Kefir
It’s totally normal to have questions when you’re trying a new fermentation project like Beginner-Friendly Water Kefir! Here are some common questions and easy solutions to make sure your Water Kefir turns out perfectly every time.
Why isn’t my Water Kefir fizzing?
This is one of the most common questions, but it’s usually easy to fix for your Beginner-Friendly Water Kefir!
Not Enough Sugar: Remember, sugar is food for the grains! If there isn’t enough sugar in your water, the grains can’t make much fizz.
Water Quality: Chlorine in tap water can harm the grains. Make sure you’re using filtered, non-chlorinated water for your Water Kefir.
Temperature: If your room is too cold, the grains will be sluggish and won’t ferment much. Try moving your Beginner-Friendly Water Kefir to a warmer spot.
Fermentation Time (F2): The fizz really builds during the Second Fermentation (F2). If you don’t let it go long enough (usually 12-48 hours in a sealed bottle), it won’t get bubbly.
Seal Quality: For good fizz in F2, your bottles need to be airtight. If the caps aren’t sealing well, the fizz will escape.
My grains aren’t growing / are slimy.
Happy grains usually grow over time! If yours seem unhappy:
Chlorine: Again, chlorine is often the culprit. Switch to filtered water for your Beginner-Friendly Water Kefir.
Too Much/Little Sugar: Grains need the right amount of food. Stick to the recipe’s sugar ratio.
Temperature: Cold temperatures slow down growth.
Mineral Content: Sometimes grains need a tiny boost of minerals. You can try adding a few raisins or a pinch of mineral-rich unrefined sugar (like turbinado) to your F1.
Slimy Grains: This can happen if the water is too warm, the sugar quality isn’t ideal, or if the grains are just adjusting. It’s usually harmless, but you can give them a gentle rinse under filtered water before starting a new batch of Beginner-Friendly Water Kefir.
What is that white film? (Kahm yeast vs. mold)
It’s super important to know the difference for your Beginner-Friendly Water Kefir!
Kahm Yeast: This is usually a thin, white, wrinkly, or powdery film that floats on top. It’s harmless and a normal part of fermentation. It doesn’t look fuzzy or have colors like pink, green, or black. You can just skim it off.
Mold: This is bad news. Mold looks fuzzy, often has distinct colors (green, black, pink, blue), and usually grows in spots. If you see mold, discard the entire batch of Water Kefir (liquid and grains) and start fresh. Always trust your nose – if it smells “off” (not just tangy), throw it out.
How to care for Water Kefir grains long-term (resting/storing)?
If you need a break from making Beginner-Friendly Water Kefir, you can “rest” your grains:
Refrigerator Storage: Place your water kefir grains in a clean jar with fresh sugar water (use the usual F1 ratio, but you can add a tiny bit more sugar for a longer rest). Store them in the fridge. They can “rest” this way for 1-3 weeks. When you’re ready to use them again, just start a new batch. They might be sluggish for the first batch or two, so those might need a bit longer to ferment.
Can I use different types of sugar for my Water Kefir?
While unrefined cane sugar or turbinado is best for Beginner-Friendly Water Kefir, here’s what to know about other options:
Avoid: Don’t use artificial sweeteners, honey (it has its own microbes that can compete with water kefir grains), or molasses (too rich for water kefir grains generally, can cause problems).
Use with Caution: Some raw sugars can be too rich for water kefir grains and might cause sliminess or slow growth. Stick to the recommended types for consistent Beginner-Friendly Water Kefir.
Conclusion
There you have it: your ultimate guide to crafting truly amazing Beginner-Friendly Water Kefir right in your own kitchen! We’ve explored what water kefir is, how it boosts your gut health, gathered your simple ingredients and equipment, and walked through each easy step to brew your own fizzy, probiotic drink. This Beginner-Friendly Water Kefir is truly a game-changer for your wellness journey!
This isn’t just a recipe; it’s a testament to the powerful simplicity of home fermentation and a proactive step towards year-round gut health. By consistently making this delicious, homemade Water Kefir, you’re providing your body with essential probiotics, staying hydrated, and finding a fantastic alternative to sugary drinks. To understand even more about how probiotics support a healthy gut microbiome, you can explore scientific insights from reputable health organizations. You’ll notice the difference in its natural fizz and light tang, and your body will thank you for the added support.
Now that you’ve mastered this foundational recipe for Beginner-Friendly Water Kefir, your journey into homemade functional foods has truly just begun! Don’t stop here!
- Ready to explore more nutrient-dense broths for holistic wellness? You’ve just begun with your Beginner-Friendly Water Kefir, but you can also perfect your Immune-Boosting Mushroom Broth (Internal Link) to help fight sniffles, or master How to Make Mineral-Rich Vegetable Broth (Zero Waste Recipe) to utilize every scrap.
- Curious about other ways to support your well-being with functional foods? Discover our insights on DIY Adaptogen-Infused Broth (Astragalus & Rhodiola Recipe) for natural stress support.
- Want to proactively support your body with specific health goals like gut healing? Explore our Best Gut-Healing Collagen Broth Recipes (Beyond Bone Broth) (Internal Link) for digestive comfort, or learn creative ways of Using Leftover Broth Pulp (Nutrient-Dense Recipes) for healthy meals.
Embrace the delicious path to a healthier gut, a more hydrated body, and a more vibrant you, one refreshing glass of Beginner-Friendly Water Kefir at a time. Your body, your taste buds, and your kitchen will all thank you! Sources

